NSI Soft Gel Tip Adhesive
NSI RubberBase
NSI Gel Top Coat
Tech-Gel Colours
NSI Rubber Base Instructions
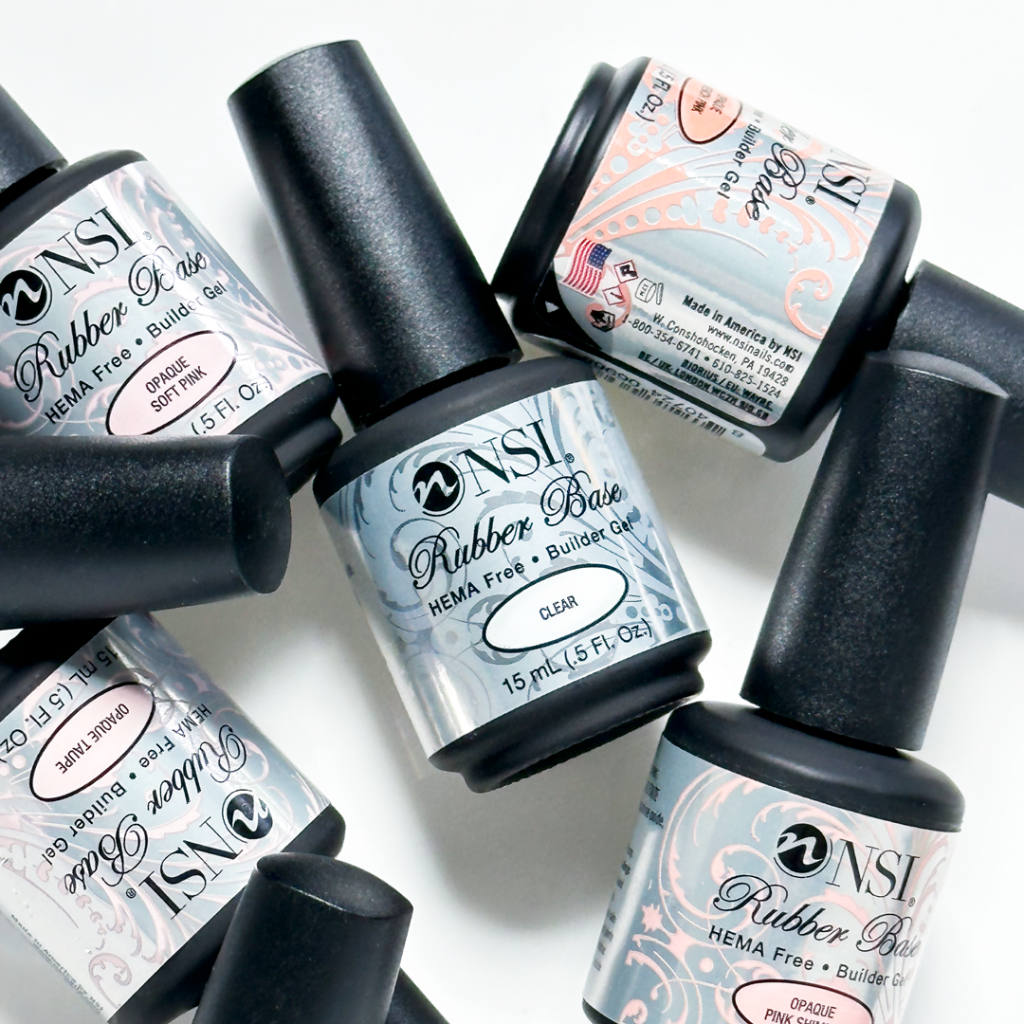
NSI Rubber Base is a foundation gel like no other. You can extend and strengthen the natural nail, with the ease of applying gel polish. Once you finish applying rubber base, you have the perfect base for your nail art creations. Paint it with Polish Pro for a polished look or use 3D embellishments to wow a client. The Possibilities Are Endless.
Natural Nail Prep
- Spray your and your client’s hands with Purify and gently massage. Push back the cuticle and gently remove the shine with your Endurance 180/180 Grit file. Using a Nail Wipe saturated with Nailpure Plus, press and rub into the natural nail.
- If extensions are desired, adhere a tip or fit a nail form at this time.
- Apply Essential Bond to the natural nail. Remove the brush from the bottle and wipe off excess product on the edge of the bottle, then brush onto two natural nails. Re-dip the brush and repeat the process until the nails are coated. Allow to dry for one minute. They will not appear chalky white.
- After proper nail prep, apply an even layer of Essential Base Coat over the natural nail. This thin layer ensures that proper bonding and adhesion will occur for the subsequent layers. Cure in LED for 30 seconds or in UV for 2 minutes.
Natural Nail Overlay
- Using the Rubber Base gel, your choice of colour, place the gel near the cuticle line, allowing room for your margin, and pull product forward towards the free edge. Be sure to cover the body of the nail with a thin even coverage. Cure in LED for 60 seconds or UV for 2 minutes.
- Do not remove the tacky dispersion layer, and apply a second thin coat of Rubberbase. Be sure to cover the body of the enhancement with a thin even coverage of the gel. Cure in LED for 60 seconds or UV for 2 minutes.
- Check the nail from all angles to ensure proper apex placement. If necessary, apply a small amount of Rubberbase to the upper arch. Cure in LED for 60 seconds or UV for 2 minutes. Use a Nail Wipe saturated with Cleanse to remove the tacky dispersion layer.
- Refine file using your Endurance 180/180 Grit File. Check for proper design and apex placement. File the nail so it is smooth, balanced and attractive following the curvature of the nail. Remove excess dust with your Plush Brush. Use a Nail Wipe saturated with Cleanse to remove any dust that may be hiding in the side walls.
- Apply Glaze ‘n Go LED or NSI Gel Top Coat and cure in LED for 60 seconds or UV for 2 minutes. Condition the cuticle and surrounding skin with Nurture Oil.
Sculpt (Tip Or Form)
- Once your tip or form is applied, place the gel near the cuticle line, allowing room for your margin, and pull product forward towards the free edge. Be sure to cover the body of the nail with a thin even coverage. Cure in LED for 60 seconds or UV for 2 minutes.
- Do not remove the tacky dispersion layer, and apply a second thin coat of Rubberbase. Be sure to cover the body of the enhancement with a thin even coverage of the gel. Cure in LED for 60 seconds or UV for 2 minutes.
- Check the nail from all angles to ensure proper apex placement. If necessary, apply a small amount of Rubberbase to the upper arch. Cure in LED for 60 seconds or UV for 2 minutes. Use a Nail Wipe saturated with Cleanse to remove the tacky dispersion layer.
- Refine file using your Endurance 180/180 Grit File. Check for proper design and apex placement. File the nail so it is smooth, balanced and attractive following the curvature of the nail. Remove excess dust with your Plush Brush. Use a Nail Wipe saturated with Cleanse to remove any dust that may be hiding in the side walls.
- Apply Glaze ‘n Go LED or NSI Gel Top Coat and cure in LED for 60 seconds or UV for 2 minutes. Condition the cuticle and surrounding skin with Nurture Oil.
To Add Color
- Now that you have your Rubber Base structure built, it’s time to add a design!
- For a Polished Look: Apply a gel polish, or the Tech-Gel Tack-Free Gel Colour.
- Just Go Nude, apply NSI Gel Top Coat for a pretty nude nail.
Removal
- Remove the shiny top coat with an Endurance 180/180 Grit File.
- Place the tips of the fingers into a bowl of Soothing Soak Off Remover. This will keep your clients’ hands hydrated and pampered during removal.
- Continue to file and soak until the product is completely removed. The product will go frilly around the edges of the enhancement. When ready it will be soft. Use an orange stick or equivalent tool to peel off the remaining product.
OR
An excellent way to remove to Rubberbase System is to saturate a Nail Wipe with Soothing Soak Off Remover and place on the nail. Then, wrap the finger in aluminum foil and allow body heat to activate the removal.
NSI Steamer Remover Instructions

Instructions for how to remove gel nail polish with Nail Steamer Remover:
The NSI Nail Steamer Remover is to be used with your preferred nail remover solution such as Soothing Soak Off Remover or Acetone.
This Nail Steamer Remover is made for the removal of nail products that can be removed with Acetone.
Instructions for how to remove gel nail polish.It works with the combination of 3 factors:
- Solvent Solution e.g. Soothing Soak Off Remover or Acetone
- Warming of Solution to a medium heat generating steam and moisture assisting in a great advanced soak off method!
- Time & Patience
Instructions:
- Place the Nail Steamer Remover machine on a hard, level and flat surface.
- Turn the Black Lid counter clockwise and lift it off to reveal the clear plastic bowls inside. (1 is a spare, leave it to the side)
- Pour Approx. 8ml of Soothing Soak Off Remover or Acetone into the clear plastic bowl / container. (This amount of liquid will be sufficient for both Hands)
- Close the Black Lid back into its original and correct position.
Warning: DO NOT pour Acetone or Soothing Soak Off Remover directly into the Nail Steamer Remover! This will Damage the integrity of the Nail Steamer Remover!
Warning: You Must use the included Clear Plastic Bowls to pour the Acetone in!
Important Step – Do Not Skip:
- Use a Coarse Nail File like the NSI Endurance 100/100 Grit File or an 80/80 Grit File to firstly File and remove the Top Coat / Layer you have on your Nail Enhancements. This will allow the Nail Gel Steamer to better penetrate deeply and break down the products you have on your nails. Top Coats are made to be water and solvent resistant so you need to file that off to be able to let the Nail Steamer Remover go to work on the products underneath!
- Remove any Glue, Adhesive, Nail Rhinestones or other Nail Bling’s you have on top of your nails. These generally file off easily and don’t need to go in the Nail Steamer Remover.
Operating Nail Steamer Remover Instructions:
- Turn the Nail Steamer Remover ON by pressing the switch / button located on the back of the Nail Steamer Remover.
- A red light on the front will appear on H for Heat indicating it is now heating up – but not yet ready to use.
- After approximately 30 seconds, the Nail Steamer Remover will Beep indicating and showing a green light on S for Start/Steam.
- Now Insert your Fingers into the Black Finger Compartments and wrap your fingers around the inside dome, gripping and forming a circle position with your fingers slightly apart. You can, if you wish, also lower your fingers down into the solution in the bowl if you prefer, this does give a quicker option for very hard products such as Acrylics. “Also Start a Timer or take Note of the time on a clock”
- If you see the red light coming on intermittently throughout your soaking process, this is normal and just an indication that the Nail Steamer Remover is maintaining the required temperature. It is completely normal for your fingers to feel warm throughout this time, however if it feels uncomfortably hot then remove your fingers from the Nail Steamer Remover.
- At 5 minutes you will hear 2 Beeps to indicate you are halfway through the removal process.
- At 10 minutes you will hear 1 Beep and the W will become Orange indicating the steaming process has finished. It will stay on W for Warm.
- Remove your fingers from the Nail Steamer Remover and use a Cuticle Stick or a Cuticle Pusher to quickly Scrape Off the loose and now soft products . Be quick in this step because if you let your nails become Cold and Dry the products will begin hardening again and make it hard to scrape off. If you feel you took too long, simply place your fingers back in the Nail Steamer Remover and let it warm up your nails and soften the products again.
- Repeat step 8 until you have removed most, if not all the nail products you had on your nails 🙂
- Buff / Lightly File your nails till perfectly clean, apply NSI Nurture Oil and Turn Off the Nail Steamer Remover. Clean the clear plastic bowl inside the Nail Steamer Remover of all debris from nail polish, gels, Acrylic etc. Once clean and dried, the Nail Steamer Remover is ready for its next use.
Helpful Tips:
Solvents like Soothing Soak Off Remover cool down and dry quickly once your fingers are removed from the Nail Steamer Remover, so being efficient and quick is important.
You can pull out only 1 finger at a time from the Nail Steamer Remover to Scrape Off the products off of the nails. Then change and proceed onto the next finger, this way the other fingers remain wet and warm inside the Nail Steamer Remover.
If there are still some areas on your nails that have product, use the same process again ~ it might take you some extra time for the complete process.
The timing can differ significantly for different enhancement and nail product lines.
If removal is not complete after one process, It might require you to do the whole process twice so just turn the Nail Steamer Remover Off at the switch and turn it back on and start again from step one.
Store away from children. Do not use if you have any skin abrasions, cuts or open sores, Do not use if you are prone to allergies / allergic reactions.
NSI Cream Gel Polish Instructions
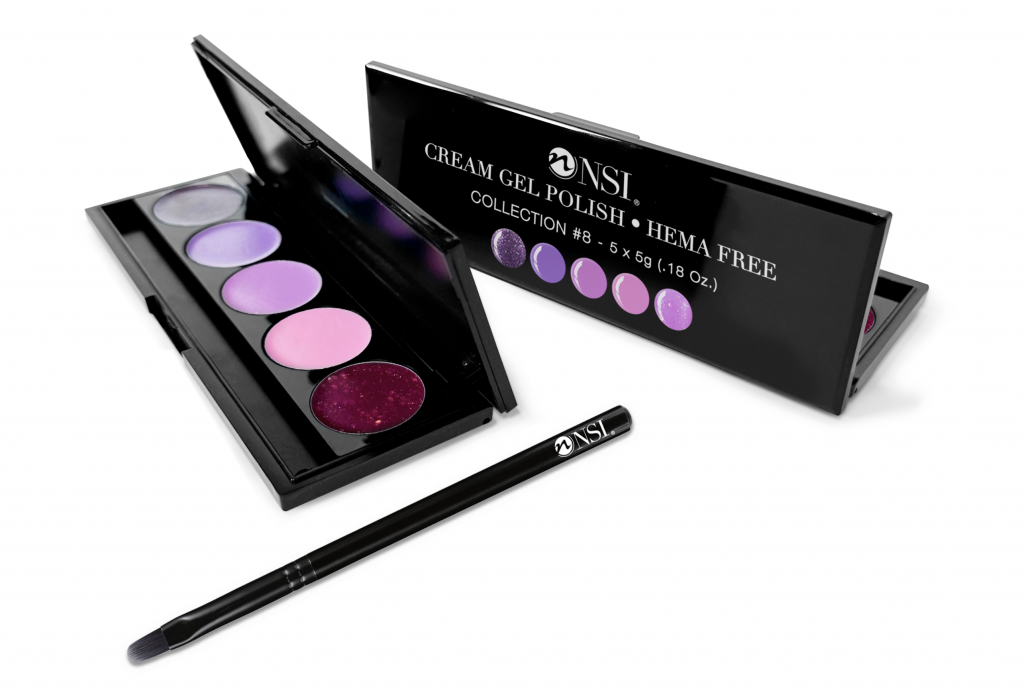
NSI Cream Gel Polish Instructions
The NSI Cream Gel Polish is an ultra-pigmented, true color solid gel polish for creating perfect polished nails or stunning nail art. The NSI Cream Gel Polish is a HEMA-Free gel color that is easy to apply, cures quickly and is perfect for use on both natural and artificial nails.
NSI’s Cream Gel Polish is versatile and can be used in a variety of nail art designs, from intricate patterns and one stroke designs to sleek and simple line designs. NSI’s Cream Gel Polish is perfect for anyone who’s looking to upgrade their nail art game.
Cures in 30 seconds in LED/UV light. Great for Nail Art or creating a polished look. Create on the go with no spills or leaks or save space on your shelves with its compact design.
Natural Nail Prep
- Spray your and your clients’ hands with Purify and gently massage. Push back the cuticle and gently remove shine with an Endurance 180/240 Grit Buffer. Using a Nail Wipe saturated with Nailpure Plus, press and rub into the natural nail.
- Apply Essential Bond to the natural nail. Remove the brush from the bottle and wipe along the edge of the bottle, then brush onto two natural nails. Re-dip the brush and repeat the process until the nails are coated. Allow to dry for one minute. They will not appear chalky white.
Natural Overlay
- Apply an even layer of Essential Base Coat to all five fingers. Be sure to cap the free edges. Cure in the Dual Cure ELITE Lamp, LED for 30 seconds or UV for 2 minutes.
- Using flattened side of your brush, gather a small amount of NSI Cream Gel Polish and apply a thin layer to the nail plate. Place the gel near the cuticle line, allowing room for your margin, and pull product forward towards the free edge. Be sure to cover the body of the nail with a thin even coverage of the gel. Cure in LED for 30 seconds or UV for 2 minutes.
- Repeat step 2 for an opaque color coverage.
- Apply one coat of Essential Seal to the entire surface. Cure in your Dual Cure ELITE Lamp, LED for 30 seconds or UV for 2 minutes. Remove the tacky dispersion layer using a Nail Wipe saturated with Cleanse. Condition the cuticle and surrounding skin with Nurture Oil.
Applying NSI Cream Gel Polish to an Enhancement
- Choose a NSI Cream Gel Polish color that you would like to apply to your finished enhancement.
- Using flattened side of your brush, gather a small amount of NSI Cream Gel Polish and apply a thin layer to your enhancement surface. Brush down in a nail polish like stroke. Ensure to coat nail evenly. Cure in your Dual Cure ELITE Lamp for 30 seconds LED, or UV for 2 minutes.
- Repeat Step Two.
- Apply one coat of Essential Seal to the entire surface. Cure in your Dual Cure ELITE Lamp, LED for 30 seconds or UV for 2 minutes. Remove the tacky dispersion layer using a Nail Wipe saturated with Cleanse. Condition the cuticle and surrounding skin with Nurture Oil.
Easy Fade Application
- Apply an even layer of Essential Base Coat to all five fingers. Be sure to cap the free edges. Cure in the Dual Cure ELITE Lamp, LED for 30 seconds or UV for 2 minutes.
- Choose two NSI Cream Gel Polish colors of your choice. Apply the first colour mid way down the nail. Do not cure. Clean your brush with Cleanse and pick up your second colour and apply to the remainder of the nail. Using your application brush start tapping on the gel where the two colours have met. Continue tapping until you have reached your desired blend. At times you may have to pick up a small amount of one colour and continue to blend in. Cure in your Dual Cure ELITE Lamp for 30 secs or UV for 2 min.
- Repeat Step Two.
- Apply one coat of Essential Seal to the entire surface. Cure in your Dual Cure ELITE Lamp, LED for 30 seconds or UV for 2 minutes. Remove the tacky dispersion layer using a Nail Wipe saturated with Cleanse. Condition the cuticle and surrounding skin with Nurture Oil.
Easy Ombré Application
- Apply an even layer of Essential Base Coat to all five fingers. Be sure to cap the free edges. Cure in the Dual Cure ELITE Lamp, LED for 30 seconds or UV for 2 minutes.
- Choose two NSI Cream Gel Polish colors of your choice. Apply the first colour on one half of the nail. Do not cure. Clean your brush with Cleanse and pick up your second colour and apply to the other side of the nail. Using your application brush, brush down the nail with several strokes for an even, thin mix of colors. Continue until you have reached your desired blend. Cure in your Dual Cure ELITE Lamp for 30 secs or UV for 2 min.
- Repeat Step Two.
- Apply one coat of Essential Seal to the entire surface. Cure in your Dual Cure ELITE Lamp, LED for 30 seconds or UV for 2 minutes. Remove the tacky dispersion layer using a Nail Wipe saturated with Cleanse. Condition the cuticle and surrounding skin with Nurture Oil.
REMOVAL
- Remove the shiny shield of Essential Seal with an Endurance 180/180 Grit File. Place the tips of the fingers into a bowl of Soothing Soak Off Remover. This will keep your clients’ hands hydrated and pampered during removal. Continue to file and soak until product is completely removed. The product will go frilly and soft when it is ready to remove. Use an orange stick or equivalent tool to peel off the remaining product.
OR - An excellent way to remove NSI Cream Gel Polish is to saturate a Nail Wipe with Soothing Soak Off Remover and place on the nail. Then, wrap the finger in aluminum foil and allow body heat to activate the removal.
View More Video Demos on our Youtube
Soft Gel Tip Instructions
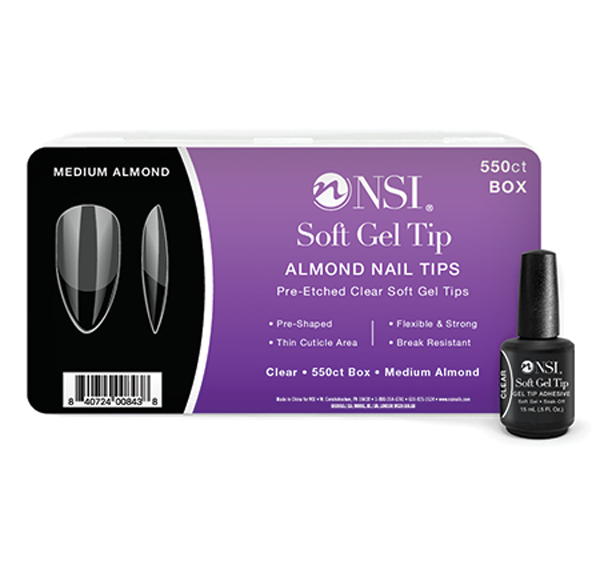
NSI Soft Gel Nails Tip Instructions
The NSI Soft Gel Nails Tip System effortlessly creates strong beautiful nail enhancements without sculpting. Cut your service time in half with the NSI Soft Gel Tips. Now it’s as easy as picking your desired shape! Apply NSI’s Soft Gel Tip Adhesive and cure for 60 seconds.
Brushes on like Gel polish, and cures for 60 seconds in a UV/LED lamp, or the NSI Flash Cure LED lamp for strong, lasting nail enhancements. The Soft Gel Tip Adhesive creates a strong lasting bond that prevents lifting or breaking of the NSI Soft Gel Tips.
The Soft Gel Tip Adhesive can be used for infills with the Soft Gel Tip System. Use the Soft Gel Tip Adhesive as the nails grow out to infill the enhancement rather than to soak off and start fresh. Or, it can be soaked off for removal. Try the NSI Soft Gel Tip System!
Application Instructions
- Spray your and your client’s hands with Purify and gently massage. Push back the cuticle and gently remove the shine with your Endurance 180/180 Grit file. Using a Nail Wipe saturated with Nailpure Plus, press and rub into the natural nail.
- Size all 10 nails with the NSI Soft Gel Tips to fit your clients nails before application of product.
- Choose the correct size by measuring from sidewall to sidewall. It is always better to size up and slightly pretailor for a proper fit. For the best fit, apply a medium pressure over the nail to check the contact area and contours of the tips.
- Apply Essential Bond Enhancer to the natural nail on all 10 fingers to promote adhesion.
- Apply Essential Bond to the natural nail. Allow to dry for one minute. They will not appear chalky white.
**Troubleshooting Tip** If your client experiences premature lifting, apply Essential Bond to the underside of the tip and allow it to dry. This will help promote a stronger bond.
- Place a small line of Soft Gel Tip Adhesive on the inside of the tip at the cuticle area.
- Holding the tip at a 45 degree angle, start from the cuticle area with constant pressure to the free edge. Roll the tip into place and apply an even, downward pressure to force out all air bubbles.
- Flash cure for 5 seconds under the NSI Flash Cure Nail Light, holding firmly the NSI Soft Gel Tip in place to maintain a good seal. Repeat on the other fingers to complete 1 full hand. When tips have been applied to all 5 fingers, cure for 60 seconds in the NSI Dual Cure Elite LED/UV Nail Lamp.
- Refine file using your Endurance 180/180 Grit File. Refine the free edges and contours of the nails if needed and gently buff the surface of the nail tips.
- Remove excess dust with your Plush Brush. Use a Nail Wipe saturated with Cleanse to remove any dust that may be hiding in the side walls.
To Add Colour
Now that you have your NSI Soft Gel Tips applied, it’s time to add a design!
- For a Polished Look: Apply Essential Basecoat and cure. Apply Polish Pro Gel Polish, or the Tech-Gel Tack-Free Gel Colour.
- Perfect Nail Art Base: Apply a thin even layer of Polish Pro to create a blank surface for your nail art and start creating your nail art design.
- Just Go Nude, apply NSI Glaze N Go Soft Pink Tack-Free top coat for a pretty nude nail.
REFILL
To maintain the Soft Gel Tips, you can use any of your favorite NSI products. Acrylic, Balance Elite or Soft Gel Adhesive. Fill like you normally would.
- Spray your and your client’s hands with Purify and gently massage.
- Shorten the nail using a tip cutter. This keeps the free edge clean and sharp. Sometimes using an e-file can cause the free edge to curl and melt.
- Using your Endurance 150/150 Grit File, start by removing old product around the cuticle and sidewalls. Continue to smooth and blend the product around the cuticle lines and sidewalls. Finish by buffing and removing all of the old gel polish off of the tip.
- Push back the cuticle. With your Endurance 180/180 Grit file, gently buff to remove all dry dead skin around the cuticle line and natural nails.
- Using a Nail Wipe saturated with Nailpure Plus, press and rub into the natural nail to remove all dust and dehydrate the nail.
- Apply Essential Bond Enhancer to the natural nail on all 10 fingers to promote adhesion.
- Apply Essential Bond to the natural nail. Allow to dry for one minute. They will not appear chalky white.
- Apply a thin layer of Soft Gel Tip Adhesive to the natural nail and pull to apply over the tip. Cure for 60 seconds in the NSI Dual Cure Elite LED/UV Nail Lamp.
- Apply a second layer of Soft Gel Tip Adhesive, starting at the cuticle line, pull from sidewall to sidewall and stretch to the middle of the apex and stop.
- Using a very soft touch, feather out to the gel adhesive towards the free edge of the nail. Flash cure for 5 seconds in your nail lamp.
- When one hand is completed, cure for 60 seconds in the NSI Dual Cure Elite LED/UV Nail Lamp.
- Using a Nail Wipe saturated with Cleanse, remove the tacky disbursement layer.
- Finish file using your Endurance 180/180 Grit File. Start by blending the product into the cuticle line and sidewalls. Continue to blend over the apex where the new and old product meet.
- Using your NSI White Block Buffer, continue to blend and smooth the surface of the entire tip.
- Check for proper design and apex placement. File the nail so it is smooth, balanced and attractive following the curvature of the nail. Remove excess dust with your Plush Brush. Use a Nail Wipe saturated with Cleanse to remove any dust that may be hiding in the side walls.
You are now ready to apply a new color over the nail!
REMOVAL FOR GEL NAILS TIPS
- Remove the shiny top coat with an Endurance 180/180 Grit File.
- Place the tips of the fingers into a bowl of Soothing Soak Off Remover. This will keep your clients’ hands hydrated and pampered during removal.
- Continue to file and soak until the product is completely removed. The product will go frilly around the edges of the enhancement. When ready it will be soft. Use an orange stick or equivalent tool to peel off the remaining product.
OR
- An excellent way to remove the NSI Soft Gel Tip System is to saturate a Nail Wipe with Soothing Soak Off Remover and place on the nail. Then, wrap the finger in aluminum foil and allow body heat to activate the removal.
View More Video Demos on our Youtube
Balance Elite Gel Instructions
Recommended Lamp:
Balance Elite Gel System works best when used with the recommended NSI products and is cured in a LED/UV Nail Lamp.
Natural Nail Prep
- Spray your and your client’s hands with Purify and gently massage. Push back the cuticle and gently remove the shine with your Endurance 180/180 Grit file. Using a Nail Wipe saturated with Nailpure Plus, press and rub into the natural nail.
- If extensions are desired, adhere a tip or fit a nail form at this time.
- Apply Essential Bond to the natural nail. Remove the brush from the bottle and wipe off excess product on the edge of the bottle, then brush onto two natural nails. Re-dip the brush and repeat the process until the nails are coated. Allow to dry for one minute. They will not appear chalky white.
SCULPTING ON A FORM
SMILE LINE & EXTENSION
- After proper nail prep, apply an even layer of Essential Base Coat over the natural nail. This thin layer ensures that proper bonding and adhesion will occur for the subsequent layers. Cure in LED for 30 seconds or in UV for 2 minutes.
- Using Balance Elite Glass Gel, start at the natural smile line. Apply a very thin layer of gel onto the nail form to create the desired length and shape of your extension edge. Freeze in between each finger. Fully cure in LED for 60 seconds or in UV for 2 minutes.
- Pick up a medium bead in your choice of Balance Elite White Gel. Using the flattened side of your brush keeping the gel on the tip, or flags of the brush, place the gel near the natural smile line. Press the brush onto the natural nail to release the gel from your brush. Do not overwork the gel, this will cause air bubbles. With a light feathery touch, create the smile line.
- Use a light floating touch to pull, glide, float and stretch the white gel to completely cover the extension edge. Wipe any gel residue from your brush on a clean Nail Wipe saturated with Cleanse. Back brush the smile line if necessary to make a smooth crisp line. Freeze in between each finger. Fully cure in LED for 60 seconds or or in UV for 2 minutes.
- Apply a medium bead of Balance Elite Glass Gel evenly over the natural nail. This will be your foundation layer of the enhancement. Stop smoothly at the natural smile line and freeze. Fully cure in LED for 60 seconds or or in UV for 2 minutes.
- Apply a small bead of Balance Elite Glass Gel to the upper arch and apex. Gently feather the gel from side to side staying in the middle of the nail, and taper the gel down towards the smile line. Stretch the gel from corner to corner of the smile line making a “T”. Freeze in between each finger. Fully cure in LED for 60 seconds or or in UV for 2 minutes.
- Refine file using your Endurance 180/240 Grit Buffer. Check for proper design and apex placement. File the nail so it is smooth, balanced and attractive following the curvature of the nail. Remove excess dust with your Plush Brush. Use a Nail Wipe saturated with Cleanse to remove any dust that may be hiding in the side walls.
- Apply your choice of top coat – NSI Gel Top Coat or Essential Seal. Follow curing instructions for either product. If using Essential Seal, wipe off the tacky dispersion layer using a Nail Wipe saturated with Cleanse. Condition the cuticle and surrounding skin with Nurture Oil.
Zones 2 & 3
Using a Balance Elite pink gel of your choice:
- After proper nail prep, apply an even layer of Essential Base Coat over the natural nail. This thin layer ensures that proper bonding and adhesion will occur for the subsequent layers. Cure in LED for 30 seconds or in UV for 2 minutes.
- Do not remove the tacky dispersion layer. Using a medium bead of Balance Elite Pink Gel, starting at the cuticle area, keep the brush parallel to the nail and use a light floating touch to stretch and pull the gel over the body of the nail, up to the smile line. Freeze in between each finger, for 10 seconds or 20 seconds in UV.
- Before fully curing, apply a small bead of Balance Elite Glass Gel to the upper arch/apex. Gently feather the gel from side to side and taper the gel down the extension edge. Keeping the bulk the gel in the apex, and the extension edge thin. Cure in LED for 60 seconds or UV for 2 minutes. Wipe off the tacky dispersion layer using a Nail Wipe saturated with Cleanse.
- Refine file using your Endurance 180/240 Grit Buffer. Check for proper design and apex placement. File the nail so it is smooth, balanced and attractive following the curvature of the nail. Remove excess dust with your Plush Brush. Use a Nail Wipe saturated with Cleanse to remove any dust that may be hiding in the side walls.
- Apply your choice of top coat – NSI Gel Top Coat or Essential Seal. Follow curing instructions for either product. If using Essential Seal, wipe off the tacky dispersion layer using a Nail Wipe saturated with Cleanse. Condition the cuticle and surrounding skin with Nurture Oil.
Natural Nail Overlay or Tip & Overlay
Using the Balance Gel of your choice:
- After proper nail prep, apply an even layer of Essential Base Coat over the natural nail and tip. This thin layer ensures that proper bonding and adhesion will occur for the subsequent layers. Cure in LED for 30 seconds or in UV for 2 minutes.
- Use a medium size bead of your choice of Balance Elite Gel. Using the flattened side of your brush keeping the gel on the tip, or flags of the brush, place the gel near the cuticle line. Press the brush onto the natural nail to release the gel from your brush and pull the product towards the free edge. Be sure to cover the body of the nail with a thin even coverage of the gel. Cure in LED for 60 seconds or UV for 2 minutes.
- Do not remove the tacky dispersion layer. Check the nail from all angles to ensure proper apex placement. If necessary, add a small amount of a clear Balance Elite Glass to the upper arch. This will ensure a strong nail and reinforce the structure of the enhancement. Cure in LED for 60 seconds or UV for 2 minutes. Wipe off the tacky dispersion layer using a Nail Wipe saturated with Cleanse.
- Refine file using your Endurance 180/240 Grit Buffer. Check for proper design and apex placement. File the nail so it is smooth, balanced and attractive following the curvature of the nail. Remove excess dust with your Plush Brush. Use a Nail Wipe saturated with Cleanse to remove any dust that may be hiding in the side walls.
- Apply your choice of top coat – NSI Gel Top Coat or Essential Seal. Follow curing instructions for either product. If using Essential Seal, wipe off the tacky dispersion layer using a Nail Wipe saturated with Cleanse. Condition the cuticle and surrounding skin with Nurture Oil.
Natural Nail Overlay or Tip & Overlay
French with Secrets Removable Brush On White.
- After proper nail prep, apply an even layer of Essential Base Coat over the natural nail and tip. This thin layer ensures that proper bonding and adhesion will occur for the subsequent layers. Cure in LED for 30 seconds or in UV for 2 minutes.
- Use a medium size bead of your choice of Balance Elite Pink Gel. Using the flattened side of your brush keeping the gel on the tip, or flags of the brush, place the gel near the cuticle line. Press the brush onto the natural nail to release the gel from your brush and pull the product towards the free edge. Be sure to cover the body of the nail with a thin even coverage of the gel. Cure in LED for 60 seconds or UV for 2 minutes.
- Do not remove the tacky dispersion layer. Check the nail from all angles to ensure proper apex placement. If necessary, add a small amount of a clear Balance Elite Glass to the upper arch. This will ensure a strong nail and reinforce the structure of the enhancement. Cure in LED for 60 seconds or UV for 2 minutes. Wipe off the tacky dispersion layer using a Nail Wipe saturated with Cleanse.
- Refine file using your Endurance 180/240 Grit Buffer. Check for proper design and apex placement. File the nail so it is smooth, balanced and attractive following the curvature of the nail. Remove excess dust with your Plush Brush. Use a Nail Wipe saturated with Cleanse to remove any dust that may be hiding in the side walls
- Using the point of your brush, dip into the container of the Secrets Removable Brush On White Gel. Pick up a small to medium amount of gel and keep the gel on the tip of the brush. The gel will be the consistency of gel polish.
- Starting with the thumb, brush onto the nail creating a smile line. Use techniques similar to polishing for a french look. Wipe any gel residue from your brush on a clean Nail Wipe saturated with Cleanse. Back brush the smile line if necessary to make a smooth crisp line. Freeze each nail for 10 seconds in UV or 5 seconds in LED. Repeat until all smile lines have been created and frozen. Cure in LED 60 seconds or UV for 2 minutes.
- Apply your choice of top coat – NSI Gel Top Coat or Essential Seal. Follow curing instructions for either product. If using Essential Seal, wipe off the tacky dispersion layer using a Nail Wipe saturated with Cleanse. Condition the cuticle and surrounding skin with Nurture Oil.