Soft Gel Tip Instructions
NSI Soft Gel Nails Tip Instructions
The NSI Soft Gel Nails Tip System effortlessly creates strong beautiful nail enhancements without sculpting. Cut your service time in half with the NSI Soft Gel Tips. Now it’s as easy as picking your desired shape! Apply NSI’s Soft Gel Tip Adhesive and cure for 60 seconds.
Brushes on like Gel polish, and cures for 60 seconds in a UV/LED lamp, or the NSI Flash Cure LED lamp for strong, lasting nail enhancements. The Soft Gel Tip Adhesive creates a strong lasting bond that prevents lifting or breaking of the NSI Soft Gel Tips.
The Soft Gel Tip Adhesive can be used for infills with the Soft Gel Tip System. Use the Soft Gel Tip Adhesive as the nails grow out to infill the enhancement rather than to soak off and start fresh. Or, it can be soaked off for removal. Try the NSI Soft Gel Tip System!
Application Instructions
- Spray your and your client’s hands with Purify and gently massage. Push back the cuticle and gently remove the shine with your Endurance 180/180 Grit file. Using a Nail Wipe saturated with Nailpure Plus, press and rub into the natural nail.
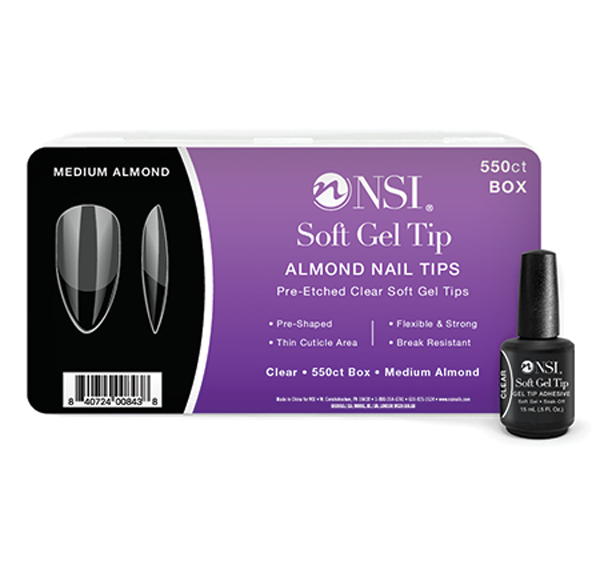
- Size all 10 nails with the NSI Soft Gel Tips to fit your clients nails before application of product.
- Choose the correct size by measuring from sidewall to sidewall. It is always better to size up and slightly pretailor for a proper fit. For the best fit, apply a medium pressure over the nail to check the contact area and contours of the tips.
- Apply Essential Bond Enhancer to the natural nail on all 10 fingers to promote adhesion.
- Apply Essential Bond to the natural nail. Allow to dry for one minute. They will not appear chalky white.
**Troubleshooting Tip** If your client experiences premature lifting, apply Essential Bond to the underside of the tip and allow it to dry. This will help promote a stronger bond.
- Place a small line of Soft Gel Tip Adhesive on the inside of the tip at the cuticle area.
- Holding the tip at a 45 degree angle, start from the cuticle area with constant pressure to the free edge. Roll the tip into place and apply an even, downward pressure to force out all air bubbles.
- Flash cure for 5 seconds under the NSI Flash Cure Nail Light, holding firmly the NSI Soft Gel Tip in place to maintain a good seal. Repeat on the other fingers to complete 1 full hand. When tips have been applied to all 5 fingers, cure for 60 seconds in the NSI Dual Cure Elite LED/UV Nail Lamp.
- Refine file using your Endurance 180/180 Grit File. Refine the free edges and contours of the nails if needed and gently buff the surface of the nail tips.
- Remove excess dust with your Plush Brush. Use a Nail Wipe saturated with Cleanse to remove any dust that may be hiding in the side walls.
To Add Colour
Now that you have your NSI Soft Gel Tips applied, it’s time to add a design!
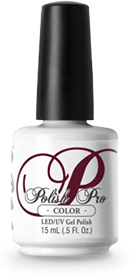
- For a Polished Look: Apply Essential Basecoat and cure. Apply Polish Pro Gel Polish, or the Tech-Gel Tack-Free Gel Colour.
- Perfect Nail Art Base: Apply a thin even layer of Polish Pro to create a blank surface for your nail art and start creating your nail art design.
- Just Go Nude, apply NSI Glaze N Go Soft Pink Tack-Free top coat for a pretty nude nail.
REFILL
To maintain the Soft Gel Tips, you can use any of your favorite NSI products. Acrylic, Balance Elite or Soft Gel Adhesive. Fill like you normally would.
- Spray your and your client’s hands with Purify and gently massage.
- Shorten the nail using a tip cutter. This keeps the free edge clean and sharp. Sometimes using an e-file can cause the free edge to curl and melt.
- Using your Endurance 150/150 Grit File, start by removing old product around the cuticle and sidewalls. Continue to smooth and blend the product around the cuticle lines and sidewalls. Finish by buffing and removing all of the old gel polish off of the tip.
- Push back the cuticle. With your Endurance 180/180 Grit file, gently buff to remove all dry dead skin around the cuticle line and natural nails.
- Using a Nail Wipe saturated with Nailpure Plus, press and rub into the natural nail to remove all dust and dehydrate the nail.
- Apply Essential Bond Enhancer to the natural nail on all 10 fingers to promote adhesion.
- Apply Essential Bond to the natural nail. Allow to dry for one minute. They will not appear chalky white.
- Apply a thin layer of Soft Gel Tip Adhesive to the natural nail and pull to apply over the tip. Cure for 60 seconds in the NSI Dual Cure Elite LED/UV Nail Lamp.
- Apply a second layer of Soft Gel Tip Adhesive, starting at the cuticle line, pull from sidewall to sidewall and stretch to the middle of the apex and stop.
- Using a very soft touch, feather out to the gel adhesive towards the free edge of the nail. Flash cure for 5 seconds in your nail lamp.
- When one hand is completed, cure for 60 seconds in the NSI Dual Cure Elite LED/UV Nail Lamp.
- Using a Nail Wipe saturated with Cleanse, remove the tacky disbursement layer.
- Finish file using your Endurance 180/180 Grit File. Start by blending the product into the cuticle line and sidewalls. Continue to blend over the apex where the new and old product meet.
- Using your NSI White Block Buffer, continue to blend and smooth the surface of the entire tip.
- Check for proper design and apex placement. File the nail so it is smooth, balanced and attractive following the curvature of the nail. Remove excess dust with your Plush Brush. Use a Nail Wipe saturated with Cleanse to remove any dust that may be hiding in the side walls.
You are now ready to apply a new color over the nail!
REMOVAL FOR GEL NAILS TIPS
- Remove the shiny top coat with an Endurance 180/180 Grit File.
- Place the tips of the fingers into a bowl of Soothing Soak Off Remover. This will keep your clients’ hands hydrated and pampered during removal.
- Continue to file and soak until the product is completely removed. The product will go frilly around the edges of the enhancement. When ready it will be soft. Use an orange stick or equivalent tool to peel off the remaining product.
OR
- An excellent way to remove the NSI Soft Gel Tip System is to saturate a Nail Wipe with Soothing Soak Off Remover and place on the nail. Then, wrap the finger in aluminum foil and allow body heat to activate the removal.
View More Video Demos on our Youtube